First, Franklin explained basics about cameras, how they take pictures, and some basics about color. Color is especially important to all of us because we all want to show off the yarns we’ve used and their true color. If you take a picture under florescent lights, for example, your photo is going to have a greenish cast to it. If your picture was taken in a wall with bright blue walls, the light is going to reflect off of the walls and give your picture a blu-ish cast.

One really great feature on your camera is the white balance feature. That means, even if you are in a greenish light and use the white balance, you can still get a decent picture. On my camera, you have to go to the white balance setting, picture of a piece of white paper (I used the back page of my camera’s manual) so the camera knows what is white in that light, and take your newly white balanced photo. This picture was taken next to the window in the lobby area without white balancing anything.
This one was. See the difference? I’m definitely seeing this setting being used frequently in the future!

Next, Franklin showed us how to construct a simple light box. His suggestion, if you want to build one yourself, was to google for directions because there are so many good ones out there. In the future, I’m definitely going to make one.

In the light box, you can control exactly how much light is falling on your project. If you want only one side illuminated to really pick up the stitch definition, you can make that happen without having to wait for the sun to move. You can also have light illuminating both sides of your project so one side of your sweater isn’t entirely in darkness and the other lit up.

Classmate's sweater
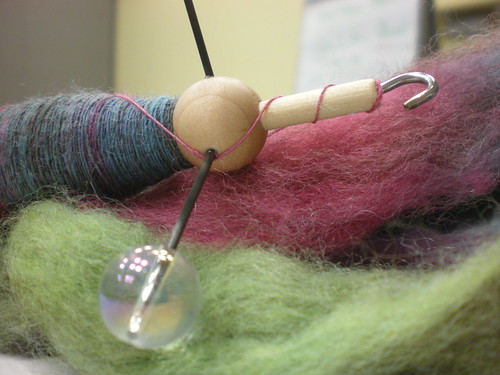
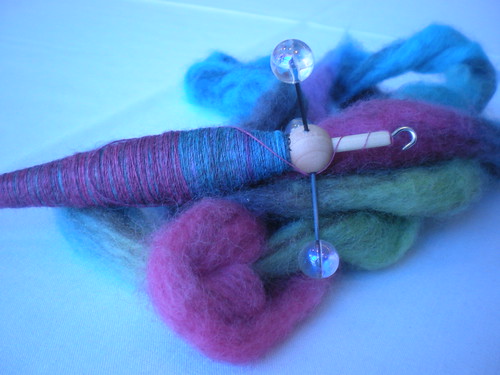
Another feature of the camera we were playing with is the aperture or lens opening of the camera and depth of field. The term “depth of field” refers to how much of the picture is in focus. You can use the depth of field to your advantage by highlighting only a small portion and blurring the fore- and backgrounds of the photo. Such a picture is said to have a “shallow depth of field.” This is especially good if you want to show off something like a button band but not the sweater as a whole. If you want the sweater as a whole, you would use a deep focus depth of field. (clear as mud yet?)
You can adjust the depth of field in your photo by adjusting the aperture diameter of your camera. The aperture diameter is measured like this: f2.8, f5, f16, etc. It’s a little counter-intuitive (a little?!) but the smaller the number (f2.8), the bigger lens opening is and you will have a shallower depth of field. So if you wanted everything in the photo in focus, you would use f16. You will have to check out your camera’s manual to see what all you can and can’t do with your camera. It’s just amazing to me that my “point and shoot” camera can have such advanced tools at its disposal.
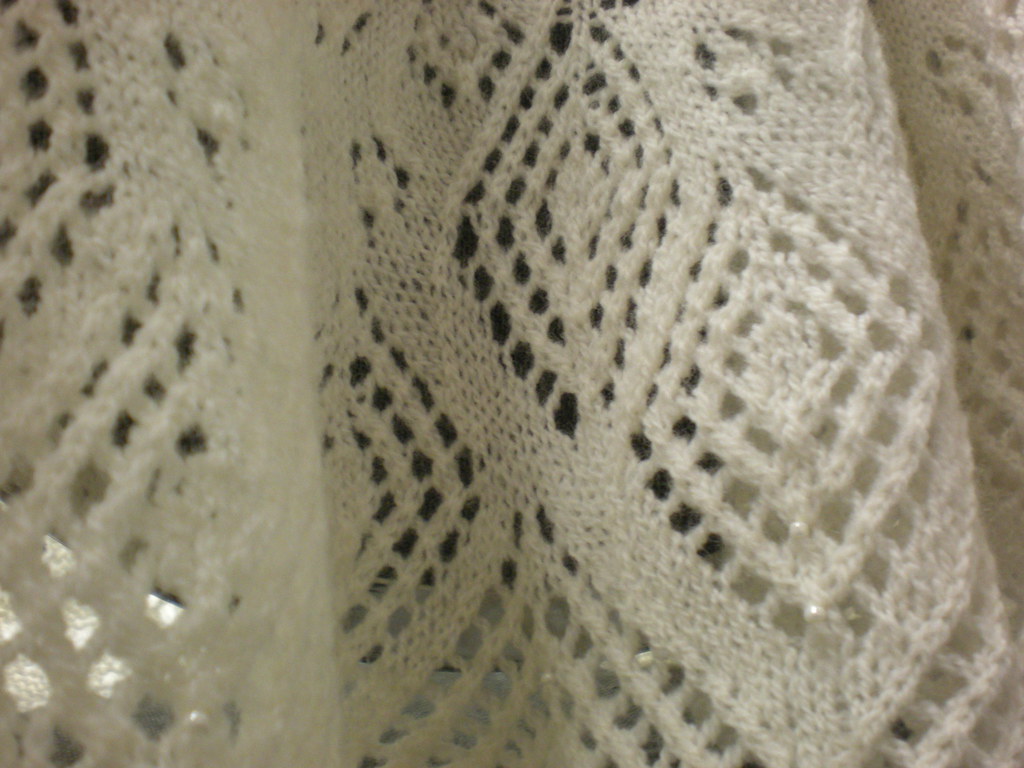
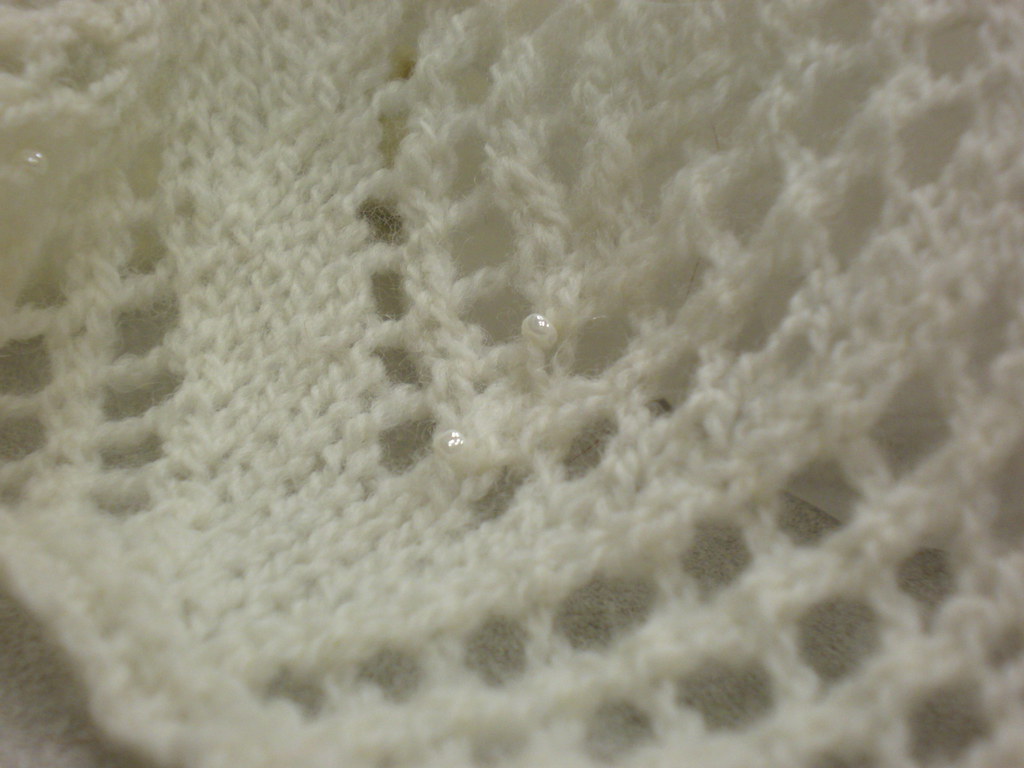
I found what Franklin said about lace to be really interesting. He told us that lace is especially hard to photograph because it needs motion to make it look beautiful. Now, I don’t mean it has to be swirling in the air while you are taking the picture. Rather, it shouldn’t be laying there flat on the table without any shadows, folds, drape, etc. It needs those shadows to give it depth. Without the depth, your lace will look dead or drab so you should either hang it off of something or prop it up to create shadows. You can also use the aperture settings to enhance certain motifs of the lace while having the rest of the project out of focus. That will cause the eye to be drawn to the motif. As you can tell, I had a lot of fun with my lace shawl!

One of the things about photography that Franklin stressed was everything takes time and practice. He compared photography with learning how to knit socks. If you only pick up your socks every 2 months and knit a couple of rows, you aren’t going to learn how to do socks. He stressed that you should practice your photography skills and expect to take time with your photo shoots. If you point and click your photo, it will look like a point and click! You might have to take tons of pictures to get that one perfect one.


1 comment:
GREAT TIP about the white balance! I'll have to read my manual to find out how to do that. I'm always discovering new things my "simple point-and-shoot" camera can do, and that's just one more. What a great class. If it comes near me, I'll take it!
Gale Zucker also teaches Photography for Knitters. I LOVE her photo work in Shear Spirit and other pubs. But I think her class might focus on SLRs more than point-and-shoots. See http://shearspirit.typepad.com/two_shear_spirits/photography-for-knitters-workshop-at-juniper-moon-farm-.html for more...
Post a Comment